


machinemachine lab: vintage bark branches
i happened across machinemachine's vintage bark branches when shannon posted a wrap-up of her trunk show on kaua'i. instant crush! there are so many possibilities . . . from a whimsical coat rack to a charming and unexpected xmas card display. since so many readers also share my love for diy design, shannon kindly agreed to whip up a tutorial so you can make one or two of your very own.
just like small kid time, let's all give a friendly, happy aloha to shannon for stopping by!
{how to make vintage bark branches}
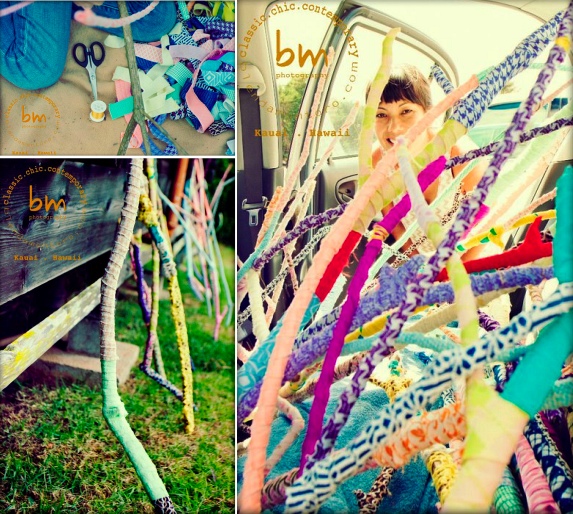
i dreamt up these vintage bark branches for a koke'e themed machinemachine trunk show at halele'a gallery in september. prior to the event, some friends and i booked a cabin in koke'e, located in the magical uplands of kaua'i, for a couple days. when we weren't eating, hiking, or cooking, we spent our time spread out on the lawn getting crafty.
we completed about thirty branches for the event, scattering them in clusters, along walls, under tables, and strapped to clothing racks. in the end, the vintage branches are not just a lovely visual symbol of the uplands, they also represent the act of binding and nurturing nature, like wrapping an ace bandage around an ankle.
{supplies}
- sturdy branches
- 1-inch wide strips of assorted fabric 15"-30" long (i use knit polyester, it's slightly stretchy with great geometric prints)
- thread
- scissors
- glue

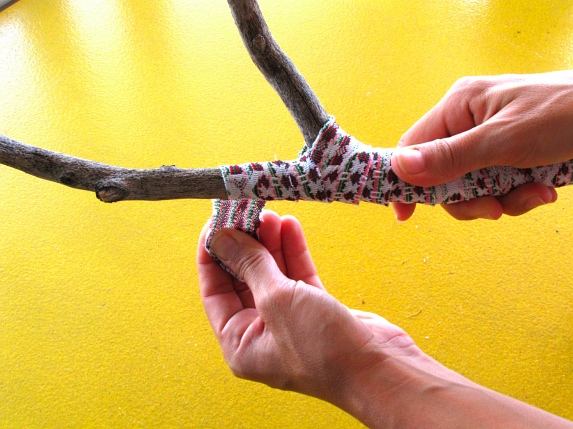
{basic branch}
start at the base of the branch. lay about 2-inches of the end of one fabric strip on the branch and wrap the strip around itself and the branch, hiding the start of your fabric tail. keep wrapping your way up the branch, making sure to completely cover the bark by slightly overlapping the strip upon itself as you wrap upwards.
if you want to change colors or need to add another fabric strip make sure to begin wrapping with a new strip well over where your old one left off. if you reach a point where the branch splits into a y-shape, fret not! all you have to do is wrap about 1.5-inches up both arms of the y, then resume wrapping just one arm of the y.
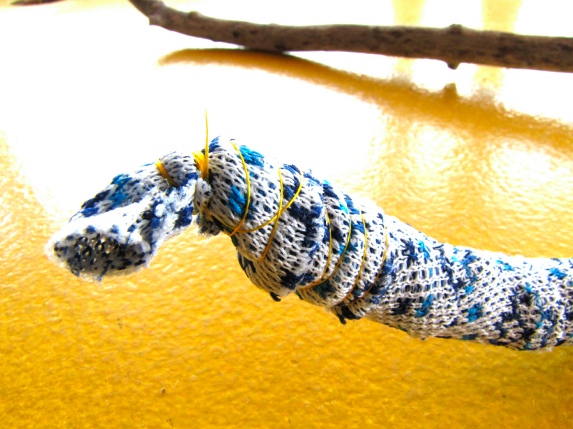
to finish the tip of the branch, wrap the fabric all the way up, leaving about a 50-inch tail then tightly twist thread around the tail, cinching it into a nub. put a dab of glue on the thread, it should dry clear.
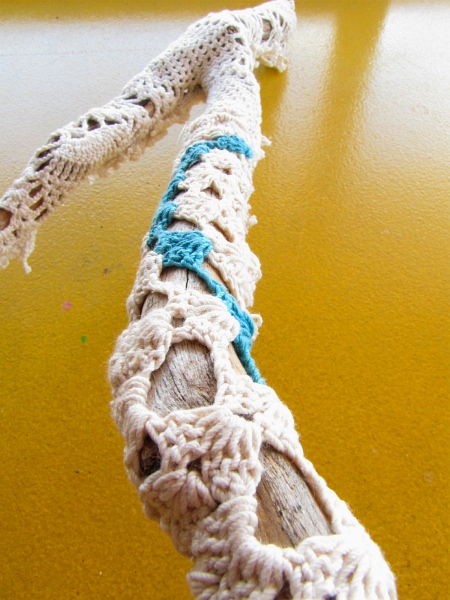
{advanced :: doily bark branch}
for this version, you will need a few doilies cut into strips wide enough to wrap around the branch (like a hot dog bun). you will need a needle and thread to stitch up the back side of the doilies, taking pains to allow for a .5-inch seam allowance, since doilies tend to unravel when cut.
{uses}
make a few and put them in a big vase in the corner of the room; hang some from the ceiling; hang a few on the wall; bind 3 to 4 together with left over fabric strips and set them on a table; hang ornaments off them during the holidays; give them away as gifts!
me again! it really is a simple project . . . especially if you have lots of scrap fabric tucked away.
many mahalos to shannon for sharing a little craft love with us! and, do click over to the machinemachine etsy shop to peek all the fresh new styles. you can also locate your neighborhood stockist over on the official website.
will you be gathering up fallen branches and vintage fabric to decorate your nest?
{photo credit: top/blenda montoro, tutorial/shannon hiramoto}
 eco goodness, studio
Reader Comments (1)
Soooooo splendid!